
Whether you’re doing stocktake each week, or on a monthly basis, growyze helps you save more than 60% of the time you’d normally take to do it using pen and paper. Here’s how to get started:
Top tip: Before you complete a stocktake using barcodes you need to have added items to your products database by scanning / or manually adding their barcodes. You can do this via the 'Products -> Items' tab in your growyze account.
1. Create or join a stocktake
To get started, you’ll need to create or join a stocktake. Choose the 'Stock' tab from the left-hand sidebar and select 'New stocktake' to create a new stocktake.

To join an existing stocktake (for example, a stocktake that is already part completed or to join your team in a group stocktake) select the correct stocktake from your list within 'History'.
Here, you can choose the correct stocktake in progress and select 'Join / Edit'.

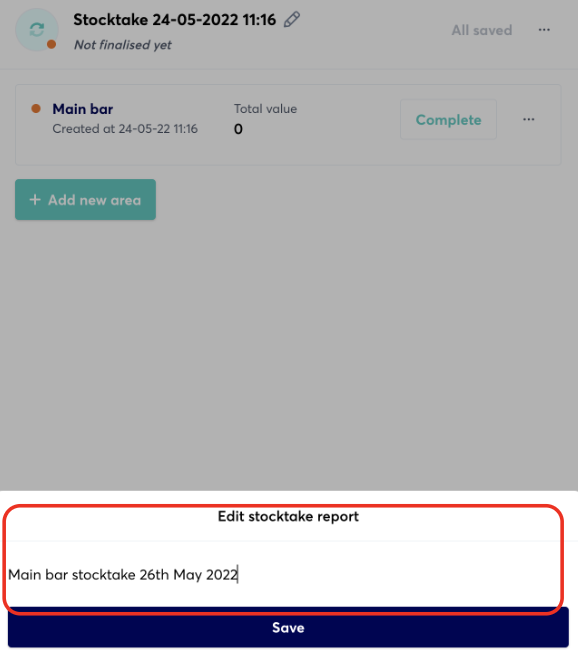
2.Name your stocktake
Once you’ve created a new stocktake, click on the pencil next to the automated stocktake name. Here you can edit the stocktake details. It’s good practice to use the same naming convention across your stocktakes, so that they’re easy to come back to. For example, the name of the area or venue, followed by the date.
3. Adding products to your stocktake
There are two main ways to begin adding products to your stocktake. The first is by barcode scanning.
Here, select 'Add product' and simply scan the barcode of the item.
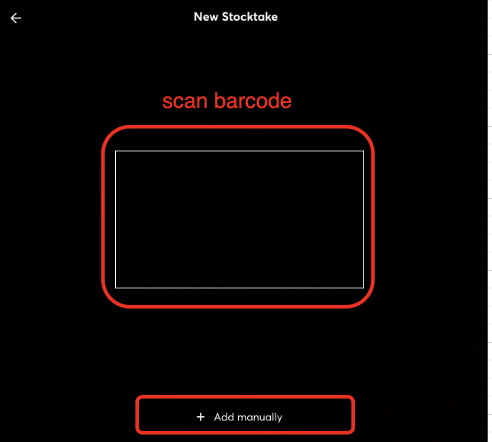
If the item doesn’t have a barcode, you can also add a product manually. Click 'Add manually' to search for the product within your database of items.
Note, only items that exist in your product database can be scanned or added manually. To add the items, go to ‘Products -> Items -> Add Item’
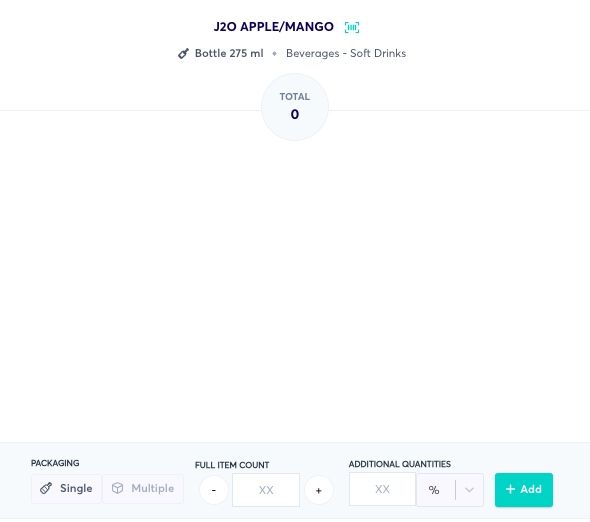
Once you have found your item you’ll need to add the quantity you’ve counted in full or part. For example, if you’ve found half of a bottle you would add '50%' in Additional Quantities and click the green 'Add' button.

When you’re happy you’ve added the correct quantity click 'Save & Next' to move onto the next item.
Continue this process until you’ve counted all of your items for that stocktake.
It is also important to note that if your product comes in a pack of multiples, you can also count it in that measure. The example shows below how easily you can flick between the two, this will save you time when counting large amounts of stock at one time.
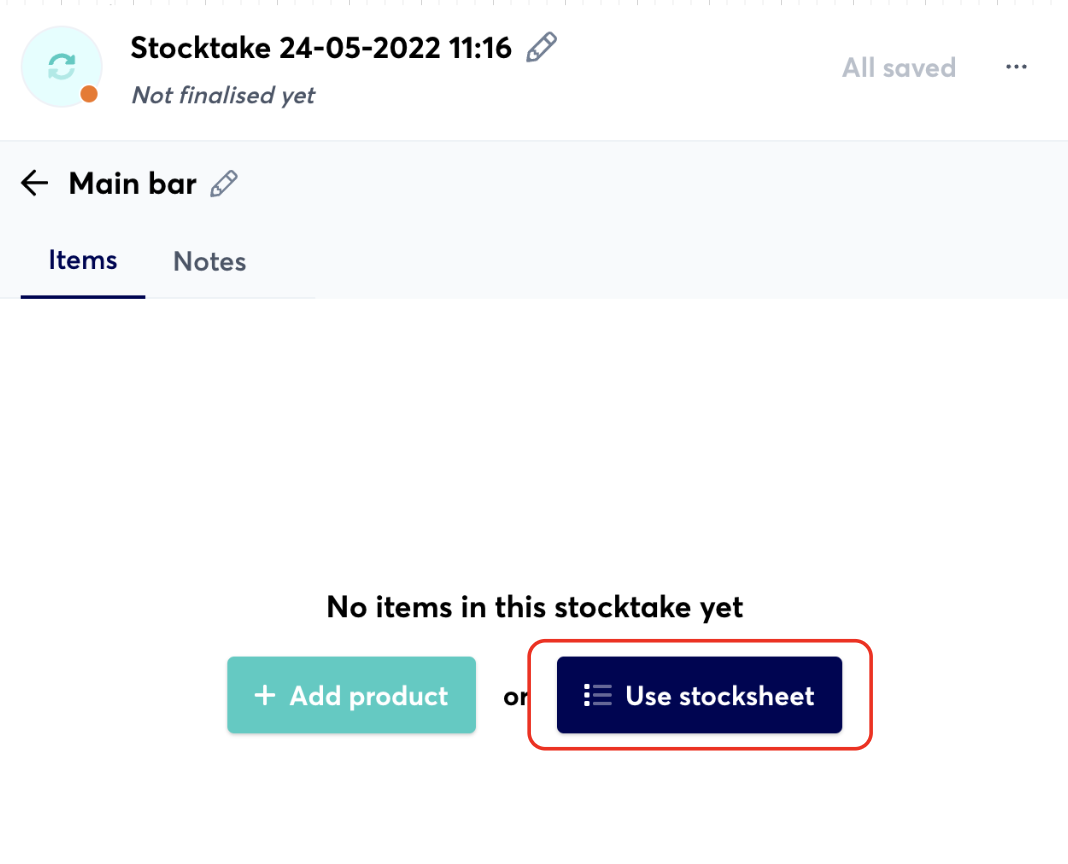
3. Creating a regular stocksheet
Some stocktakes include regular counts of the same items, counted in the same order. In this instance it can be useful to use stocksheets. These sheets contain a default list of products that you would count for each stocktake.
To create a stocksheet select ‘Sheets’ and ‘New Sheet’.

You can rename the sheet by selecting the pencil icon next to ‘New sheet’ and entering your own name. Next, you’ll need to add all of the products within that stocktake, either by scanning the barcodes or adding the products manually.
Once all of your products have been added you can then select that stocksheet within your stocktake.
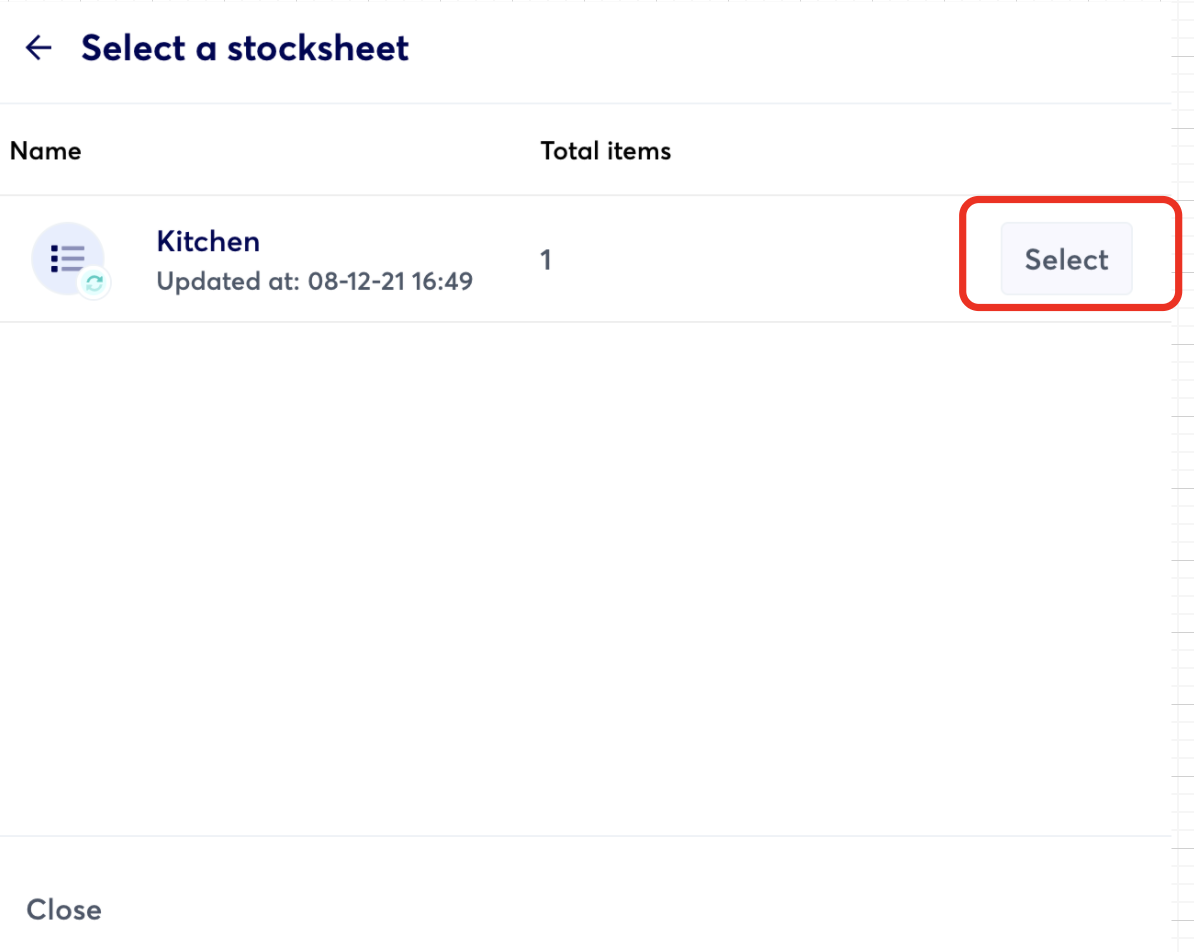
Create a new stocktake and select ‘Use stocksheet’.
Next, select the stocksheet you wish to use.
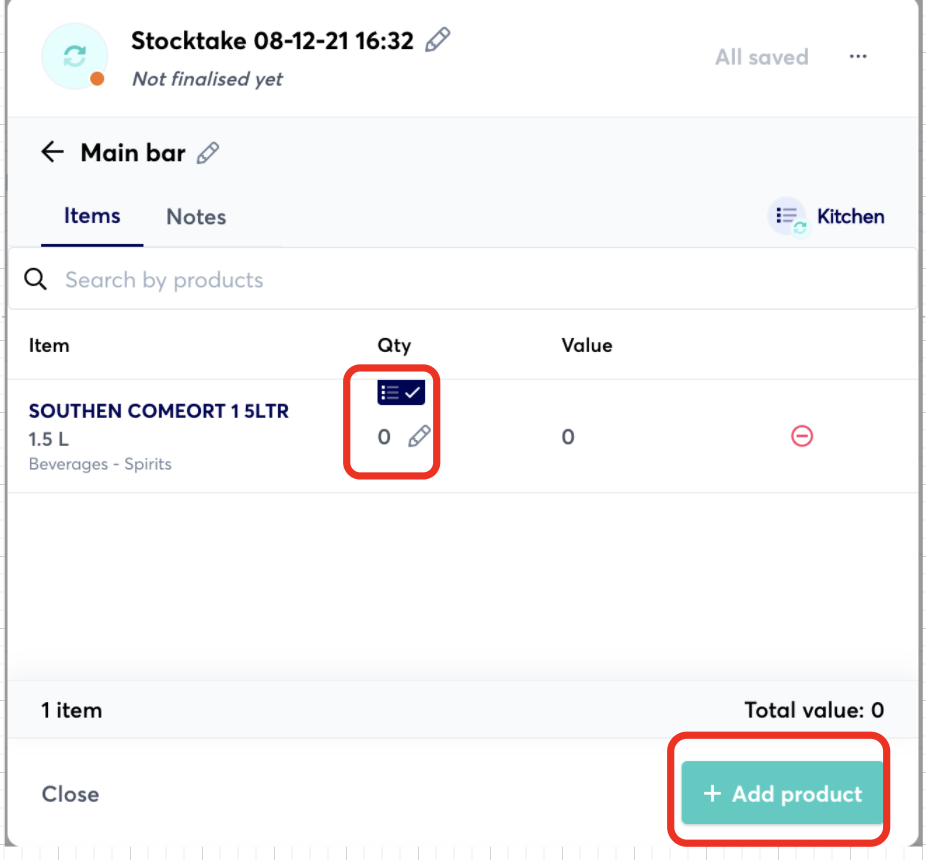
For each item you can then click on the pencil icon to enter the quantity of the item counted.
If there’s an item that is not on your stock sheet, click on the green button to ‘Add product’. Here you’re given the option to add new products by scanning the items or adding manually.
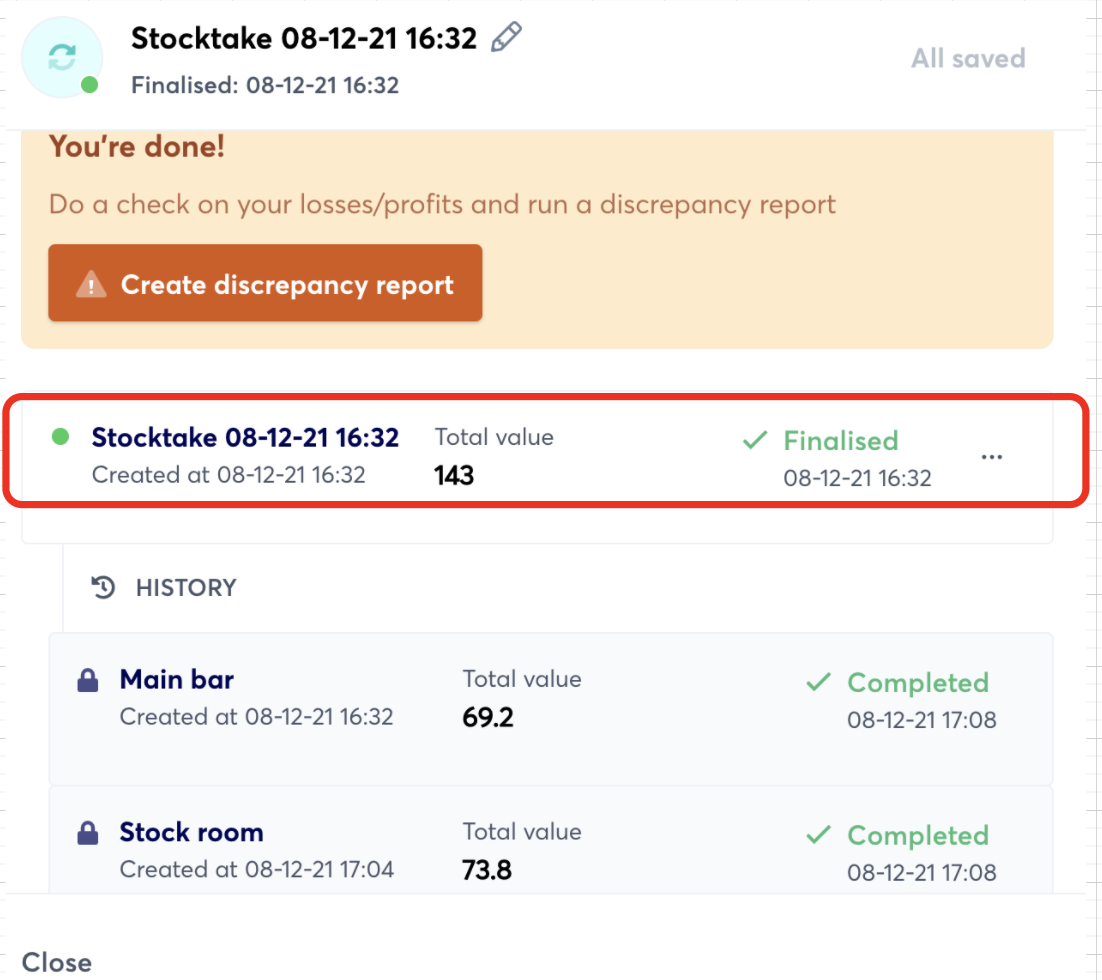
4. Complete the stocktake
When you have finished counting and are ready to submit the final stocktake, click ‘Complete’ for each area within the stocktake.
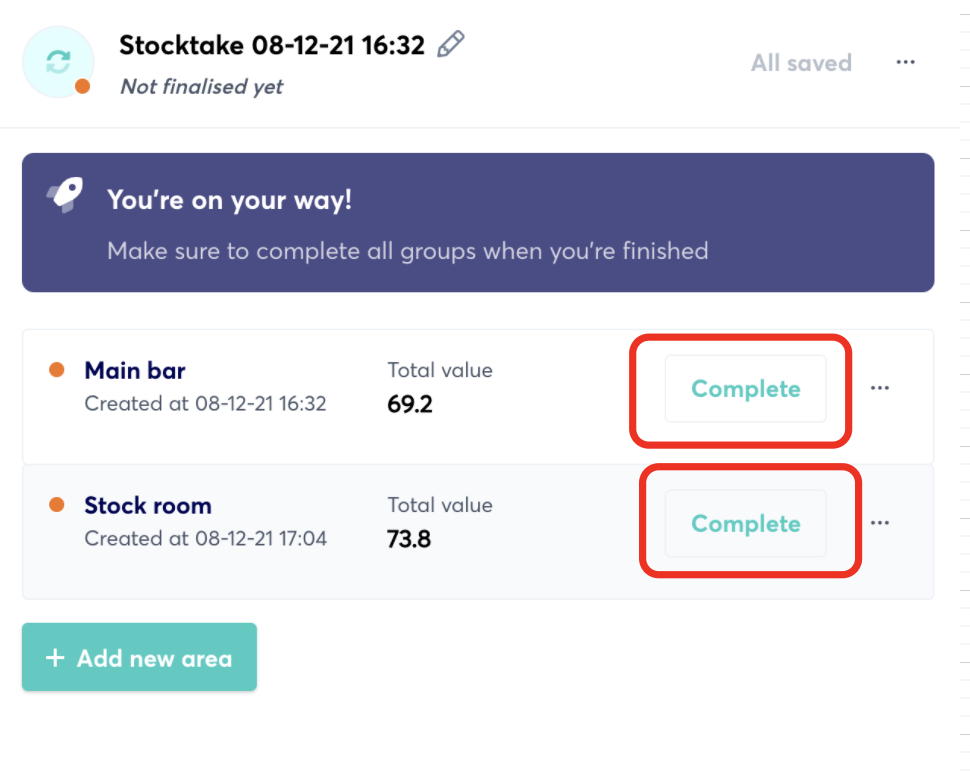
When all areas are ‘completed’ you’ll see a ‘Finalise’ button which you need to click on to finalise the full stock count. You can finalise the count once all areas have been ‘Completed’.
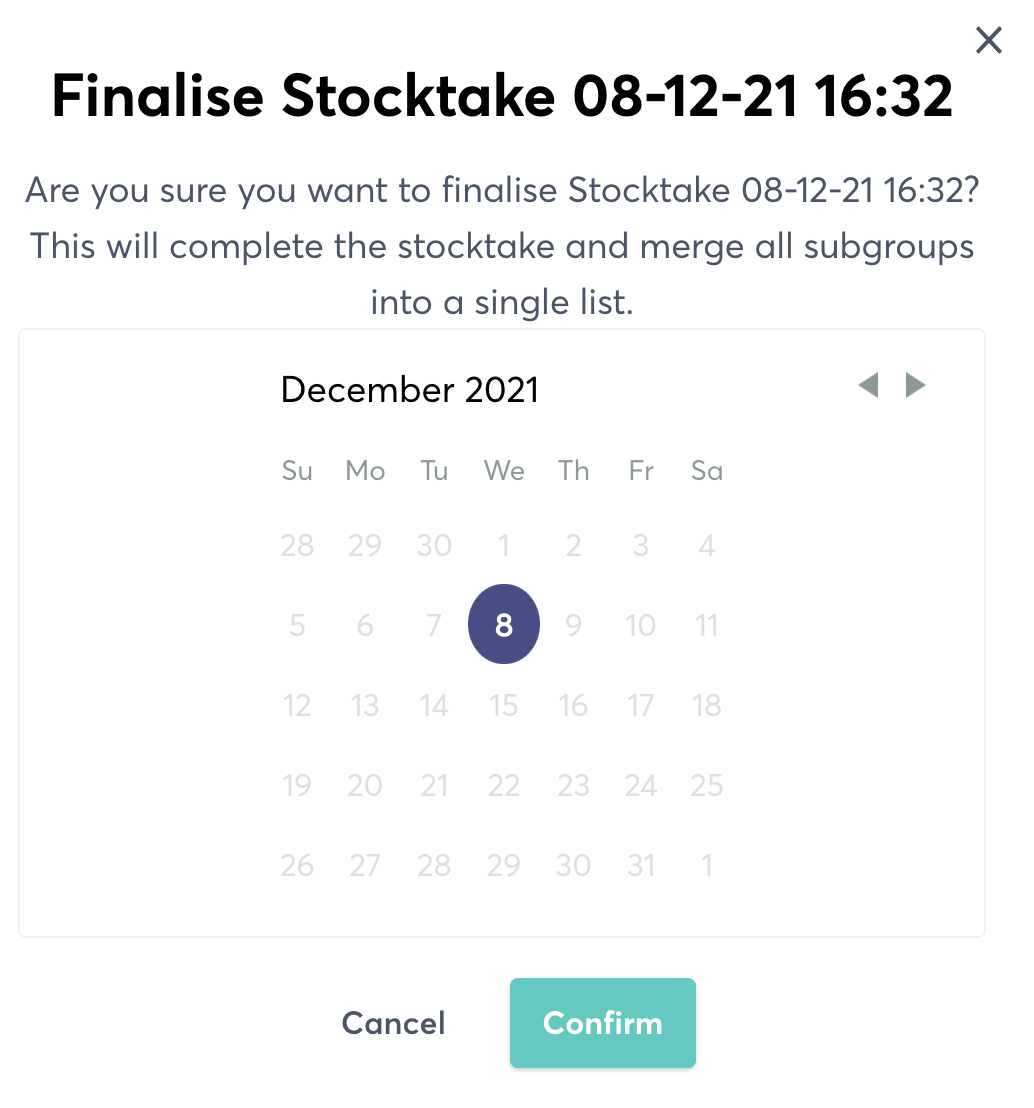
It is important to note that checking over your stocktake before finalising is crucial, this is where you can check if any errors have been made and you are able to correct them swiftly.

You’ll then be prompted to confirm the date of the stock take.
Once ‘Finalised’ you’ll see all areas ‘merged’ into one main count. This also provides the final value of items within the stocktake.
Should you wish to amend quantities of the items in the stocktake, simply click on the finalised stocktake. You’ll be given a ‘merged’ list of all items counted in the different areas, with the ability to edit the quantities.
For further help using growyze contact us at support@growyze.com.


