To start using growyze you’ll need to add details of your suppliers. This enables you to make orders easily, receive notifications on delivery cut-off dates and so much more. In this guide, we’ll walk you through how it works.
1. Add a new supplier
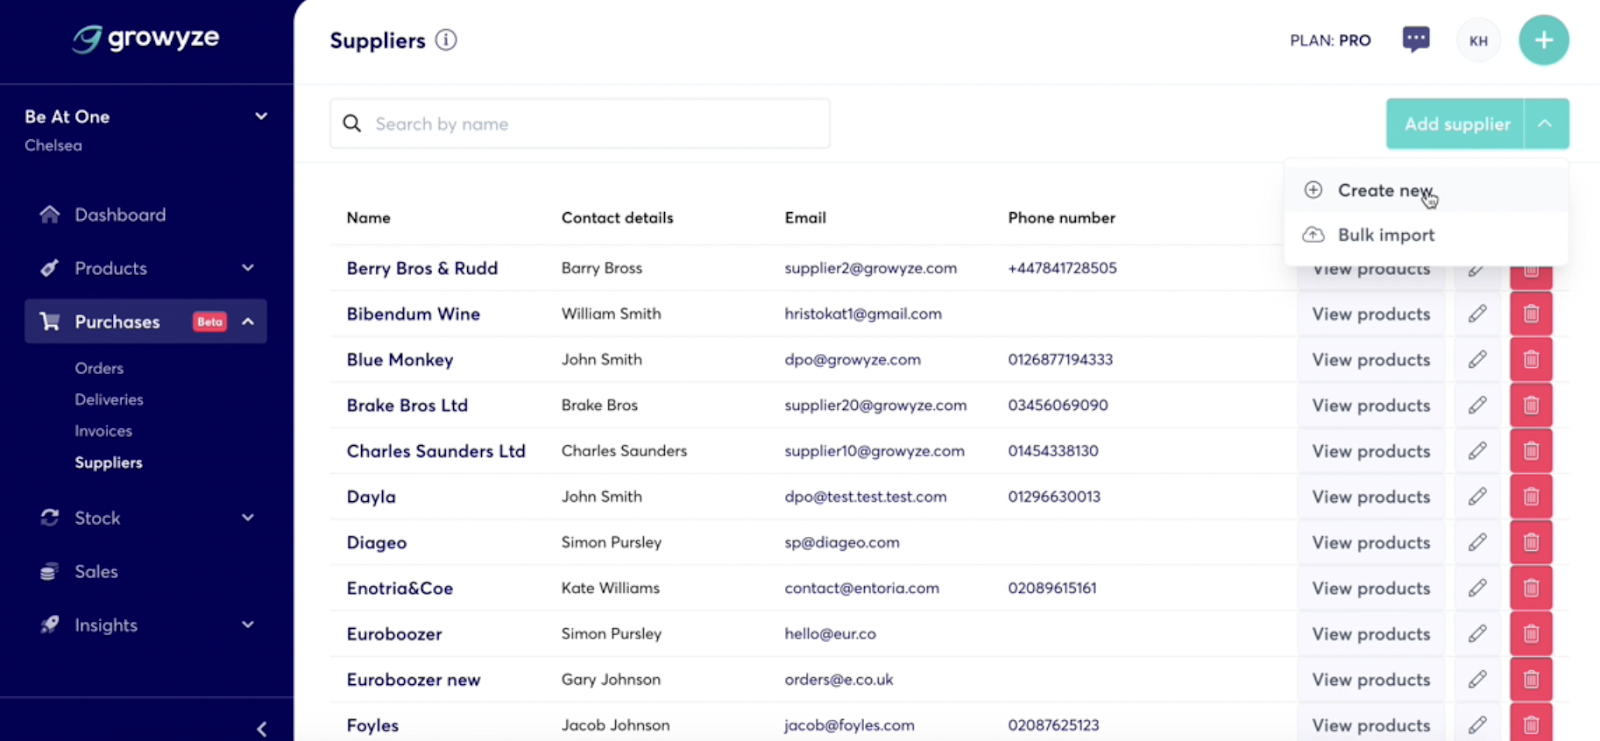
From the left-hand menu choose ‘Purchases’ and ‘Suppliers’.
Choose ‘Add supplier’. Here, you add suppliers in two ways:
a. Create a new supplier individually
To add suppliers one-by-one choose ‘Create new’.
Here you can add the details of your supplier including:
- Supplier name
- Your account number with this supplier
- A main contact (name, email, phone number)
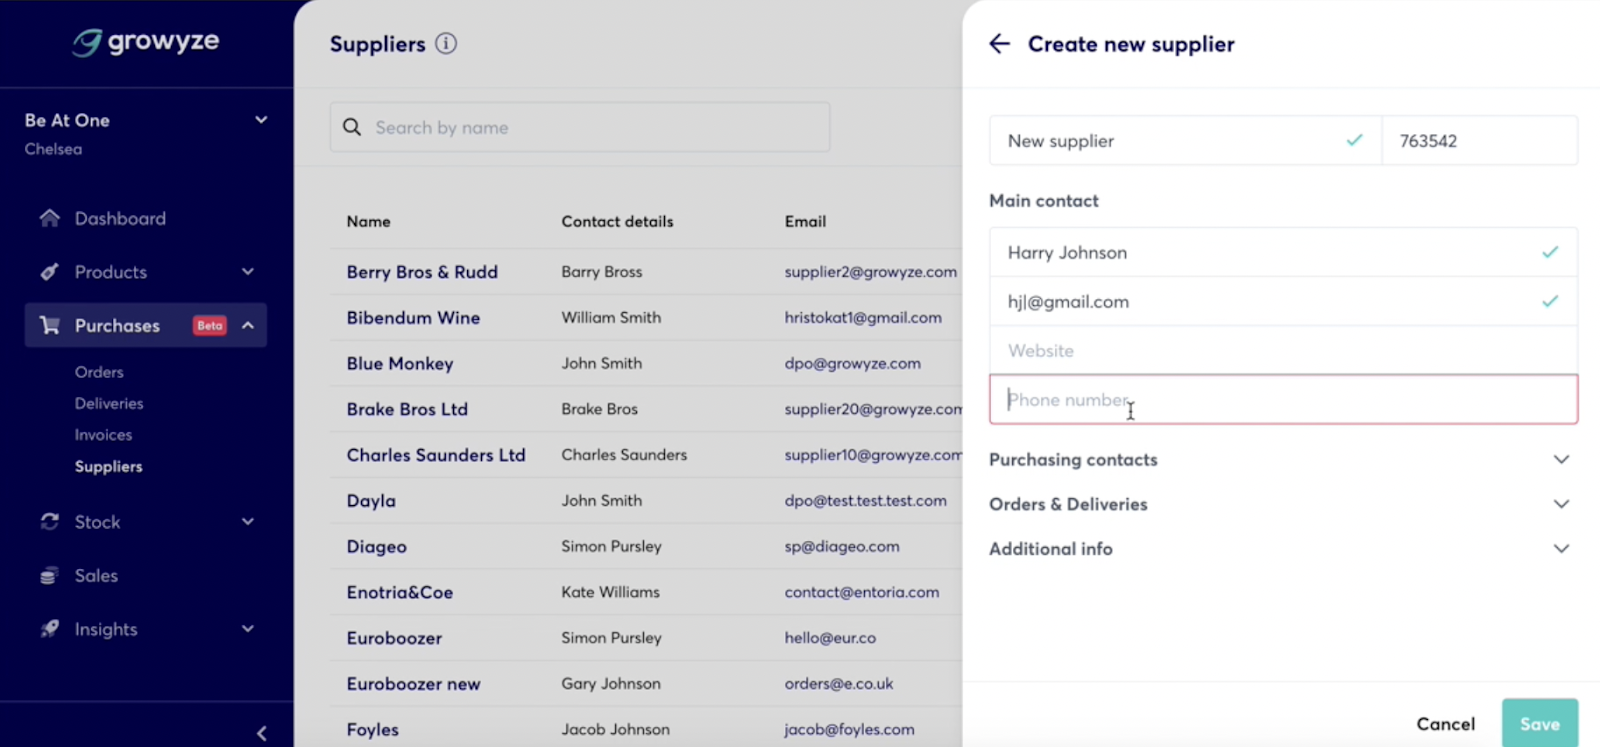
It’s important to add a main contact name to each supplier as this will allow you to automate orders and raise invoice or delivery queries automatically.
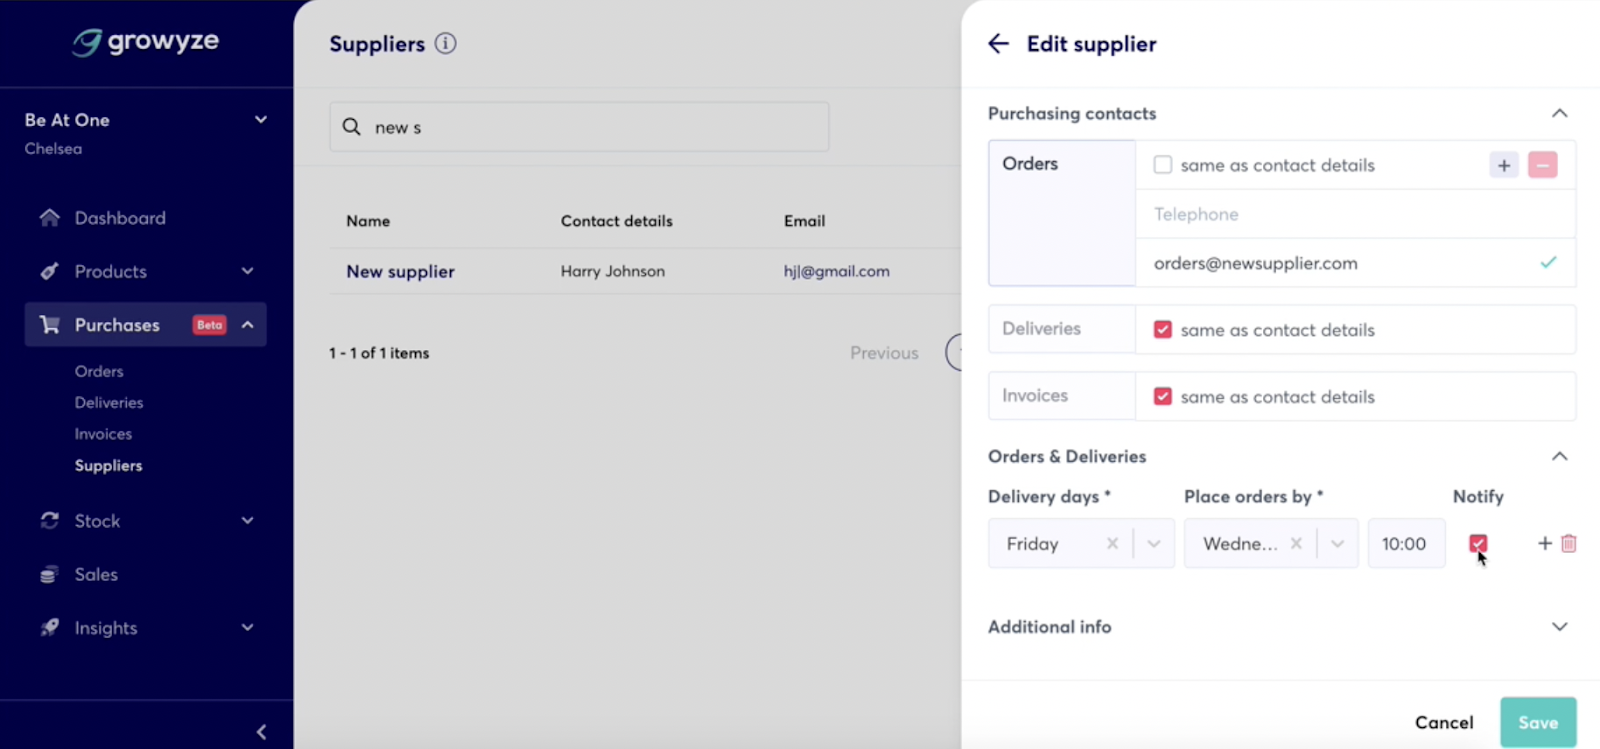
You can also add additional details such as Purchasing contacts:
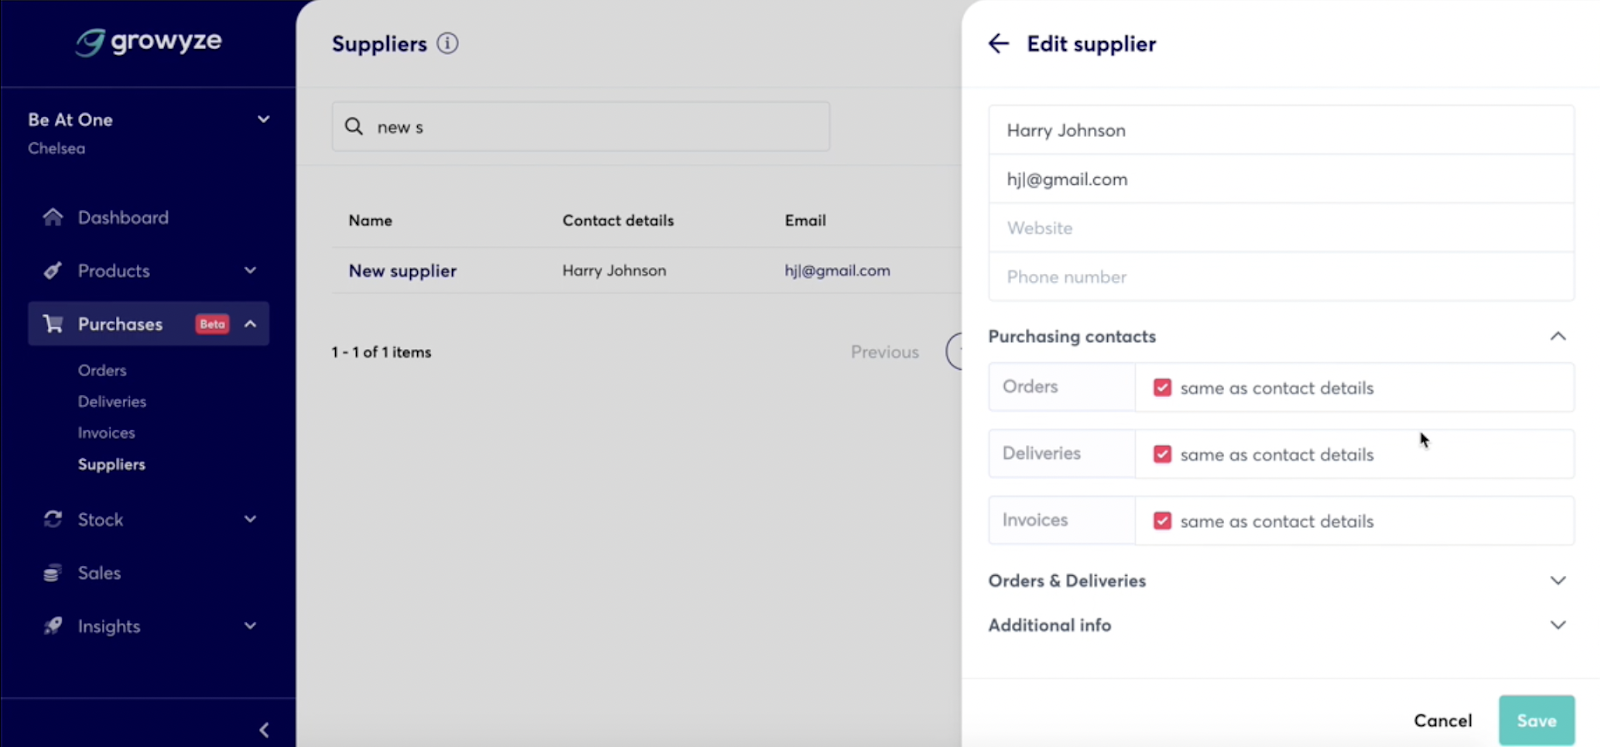
This allows you to input different contact details for your order, delivery and invoice queries, or use the same details as the main contact.
Under the ‘Order & Deliveries’ heading you can also set up an order reminder for that supplier. This is useful if the supplier has an order cut-off day or date. To do this, select ‘Set order reminder’ and enter a date and time for your reminder.
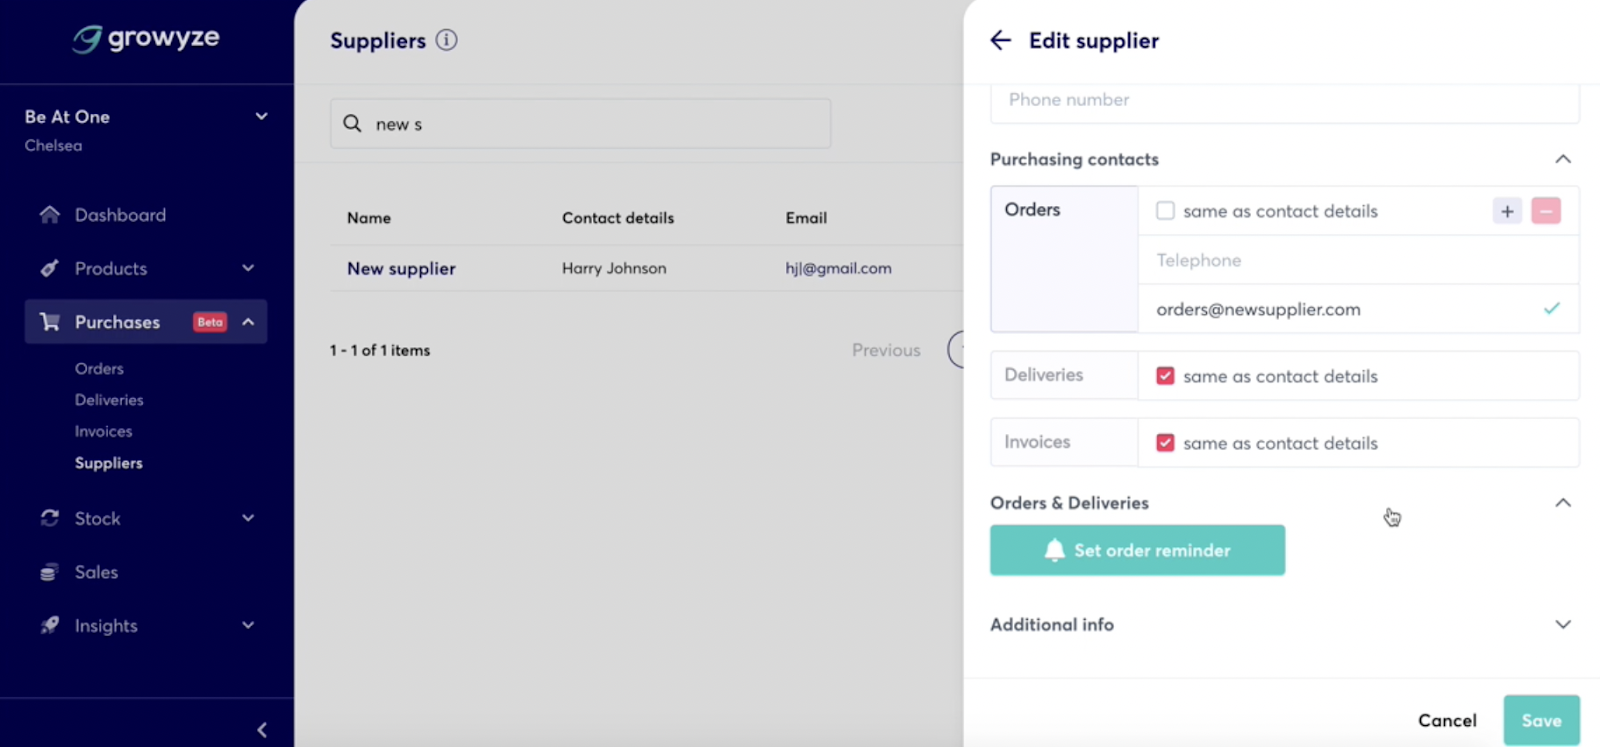
By selecting ‘Notify’ you’ll receive an email notification before the order deadline so that you can get your orders in on time.
b. Create suppliers by bulk import
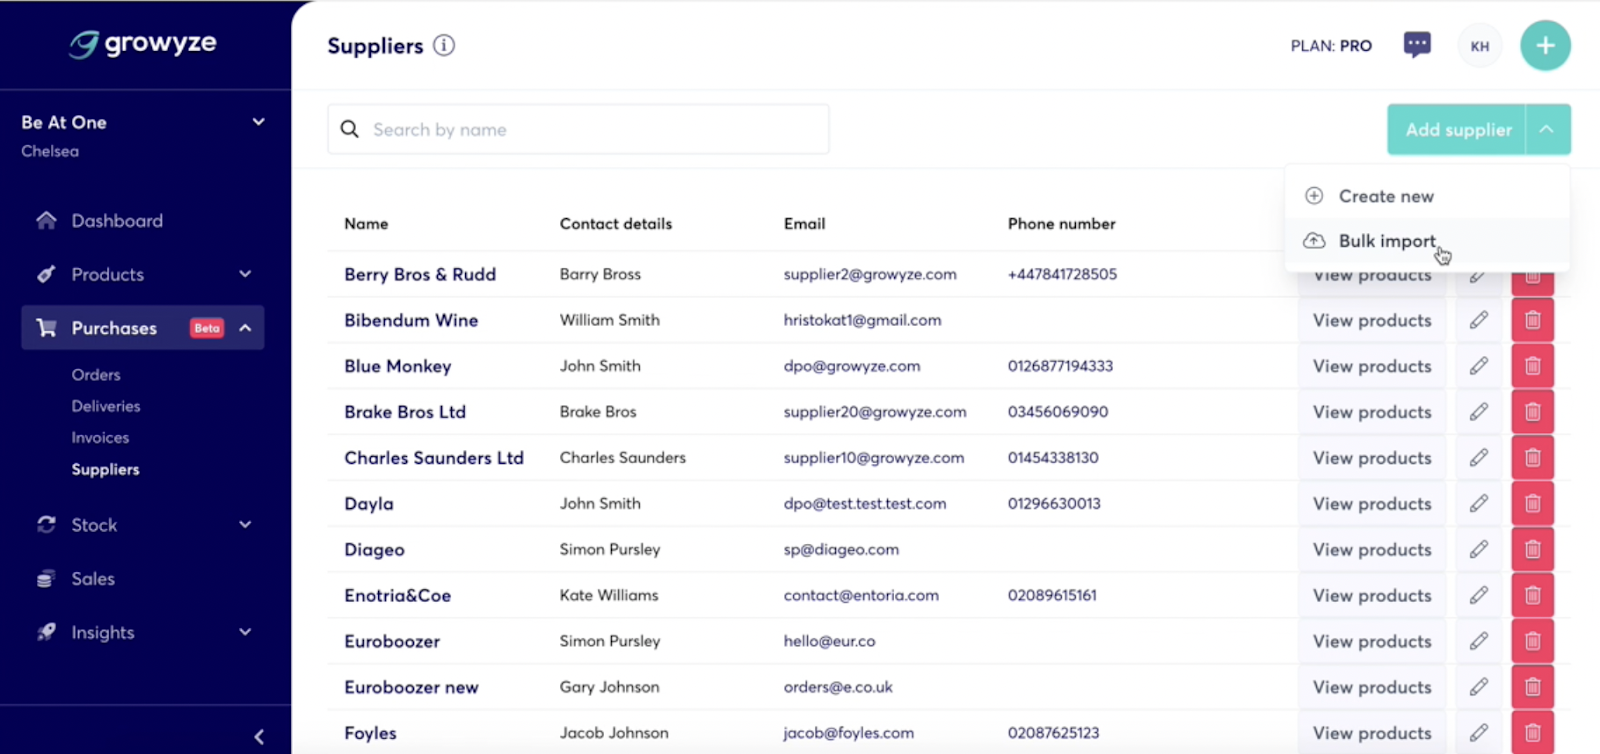
To add multiple suppliers at the same time choose ‘Purchases’ and ‘Suppliers’. From the ‘Add supplier’ dropdown choose the ‘Bulk import’ option.
Here you will need to upload a file containing your supplier details.
Within the upload screen you can see a list of what’s required within the upload file. This should be a csv, xls or xlsx file. You can include various details within your file including the supplier name, contact name, email, your account number, a phone number and more.
If you’d like an example file to use, you can download the growyze example Excel spreadsheet by choosing ‘view example’.
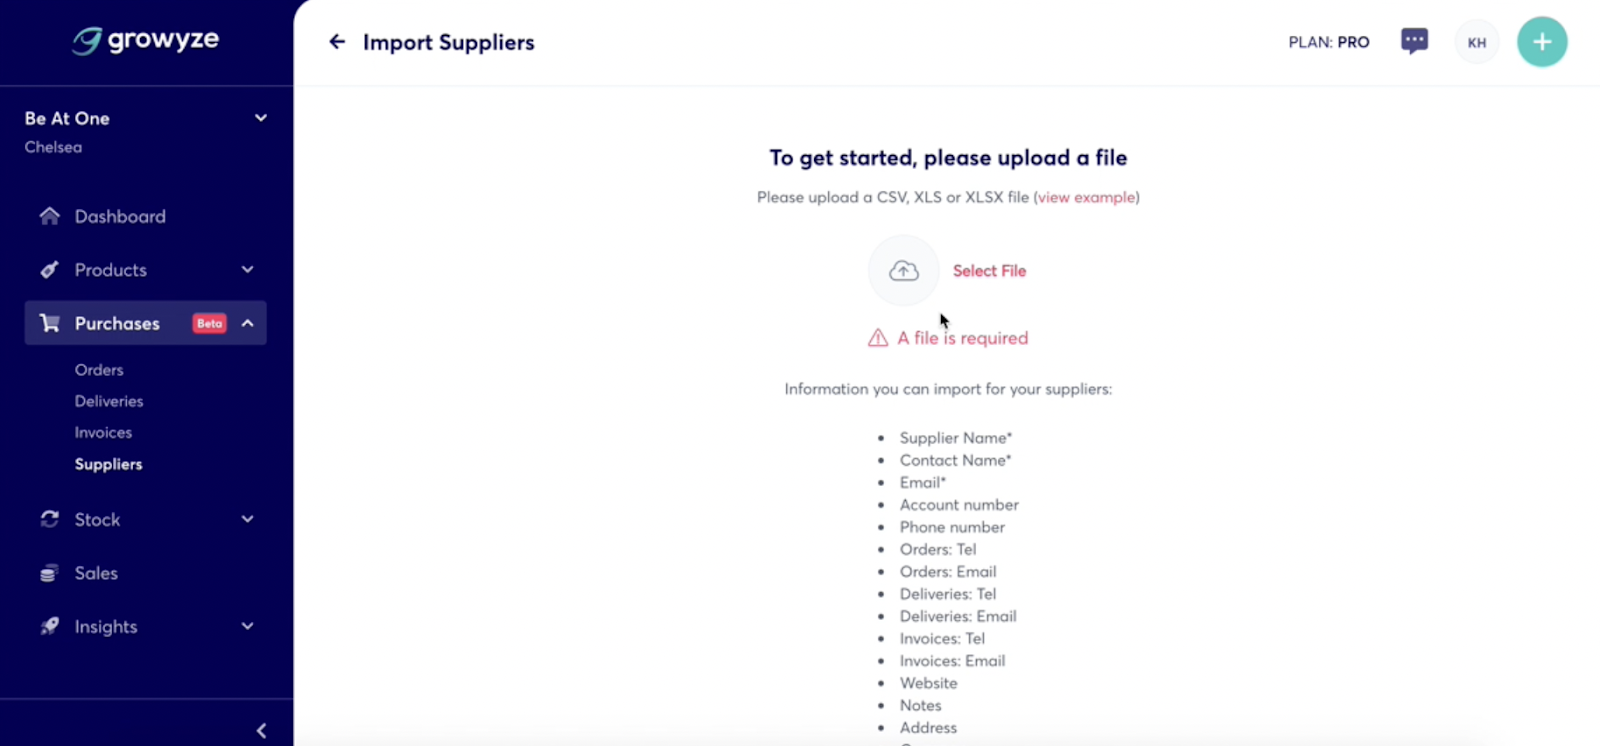
Once you have created your file and it’s ready to upload, choose ‘Select File’ and upload your file from where it’s located.
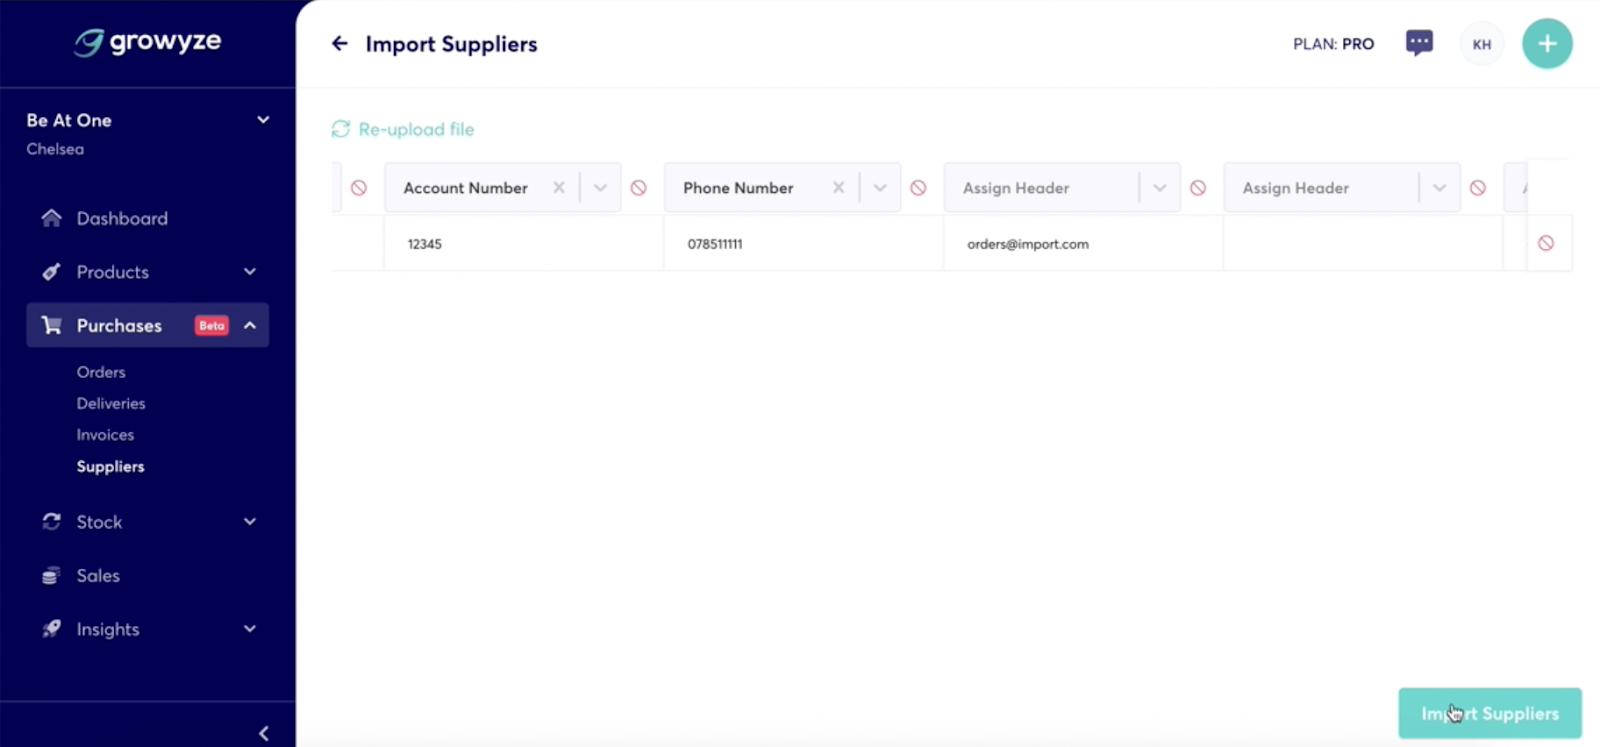
Next you’ll need to assign the headers to each column.
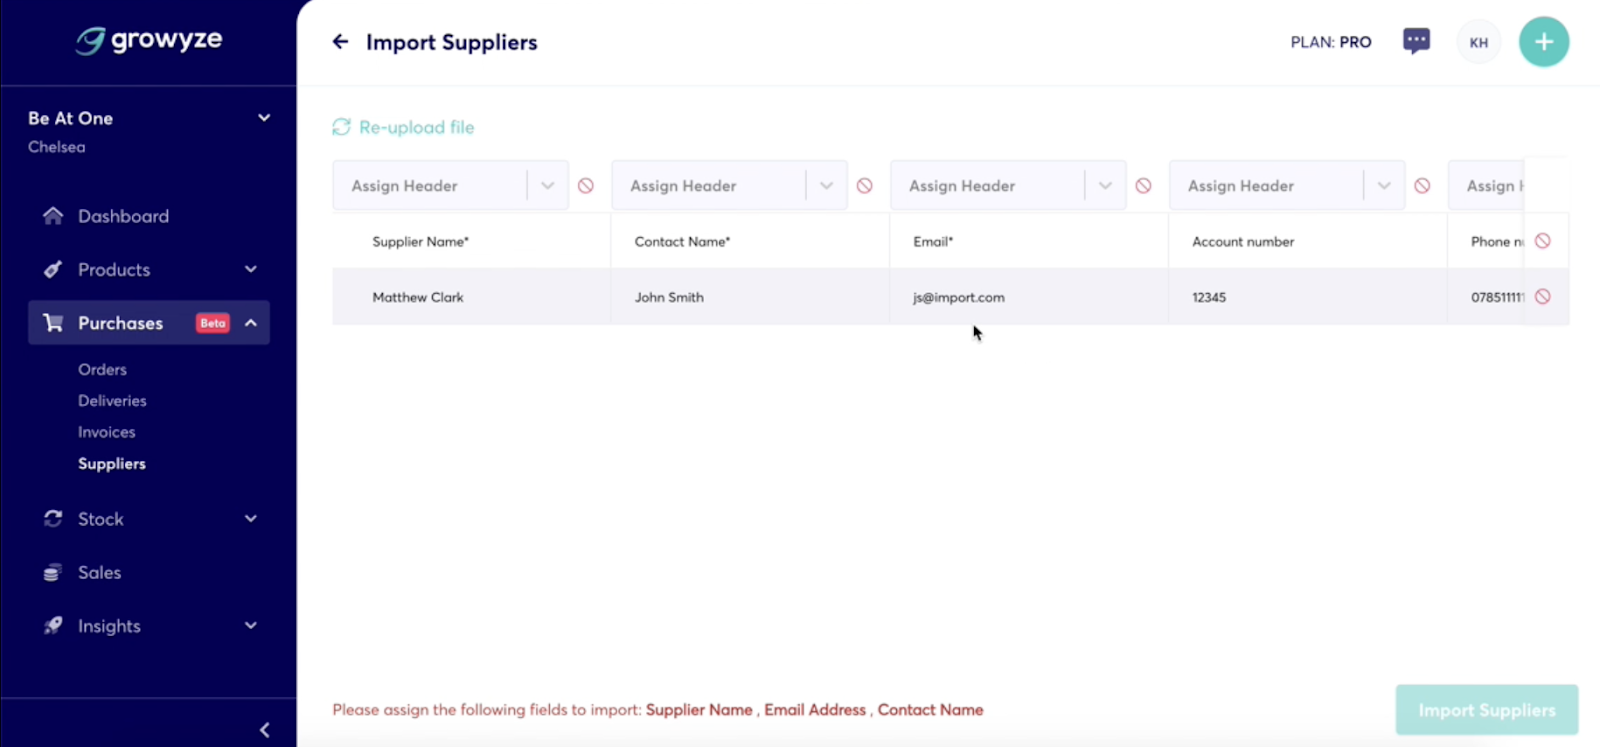
You can do this by choosing the correct header from the dropdown for each column.
To delete any redundant lines (for example the header line from your original file) choose the red icon at the right-hand side of the row.
You don’t need to worry about deleting any empty columns you aren’t using as these will automatically be left empty once you have imported your supplier information.
Once you are happy with your selections, choose ‘Import Suppliers’.
For further help using growyze contact us at support@growyze.com


